Planning & Preparation for Wine Fridge Cabinet Installation: How To Install Wine Fridge In Cabinet
Yo, Surabaya peeps! Installing a wine fridge in your cabinet? Sounds fancy, right? But before you start busting out the power tools, let’s get organized. Proper planning is key to avoid any major *kecewa* moments. This section covers everything you need to know to make sure your wine fridge installation is smooth sailing.
Necessary Tools and Materials
Getting the right tools is super important. Think of it like this: you wouldn’t try to build a Lego castle with only a screwdriver, right? Here’s what you’ll need: a measuring tape (duh!), a level, a screwdriver (both Phillips and flathead), a drill with various drill bits, a pencil, safety glasses (safety first!), potentially a jigsaw or a hand saw for cabinet modifications, electrical tape, and maybe some wood shims for leveling. For materials, you might need screws, wood filler (if you need to patch up any holes), and possibly additional electrical outlets or extension cords, depending on your setup.
Measuring the Cabinet and Wine Fridge
Before you even think about plugging anything in, measure everything TWICE. Seriously. First, carefully measure the interior dimensions of your cabinet: height, width, and depth. Then, do the same for your wine fridge, including any protruding handles or vents. Compare the measurements to ensure the fridge fits comfortably. Leave at least an inch or two of clearance on all sides for ventilation – crucial for keeping your wine at the perfect temp. Remember to account for the thickness of the cabinet walls when measuring the fridge’s depth. If your cabinet needs adjustments, you will be able to see it here.
Preparing the Cabinet for Installation
Okay, so the measurements are good. Now, let’s prep that cabinet. If your cabinet is a standard size and the wine fridge fits perfectly, awesome! You might just need to remove any shelves that are in the way. However, if you need to make adjustments, do it carefully. A jigsaw or hand saw is usually your best bet for precise cuts. Always wear safety glasses during this part! After any cutting, use wood filler to smooth out any rough edges or gaps and let it dry completely before moving on.
Checking Electrical Outlets and Ventilation, How to install wine fridge in cabinet
This is super important, especially for your electrical safety. Make sure the electrical outlet you plan to use is properly grounded and can handle the wine fridge’s wattage. If you’re unsure, consult an electrician. Proper ventilation is equally crucial. Wine fridges generate heat, and inadequate ventilation can cause the fridge to overheat and potentially malfunction. Ensure there’s sufficient space around the fridge for air circulation. If your cabinet is enclosed, you might need to create additional ventilation openings.
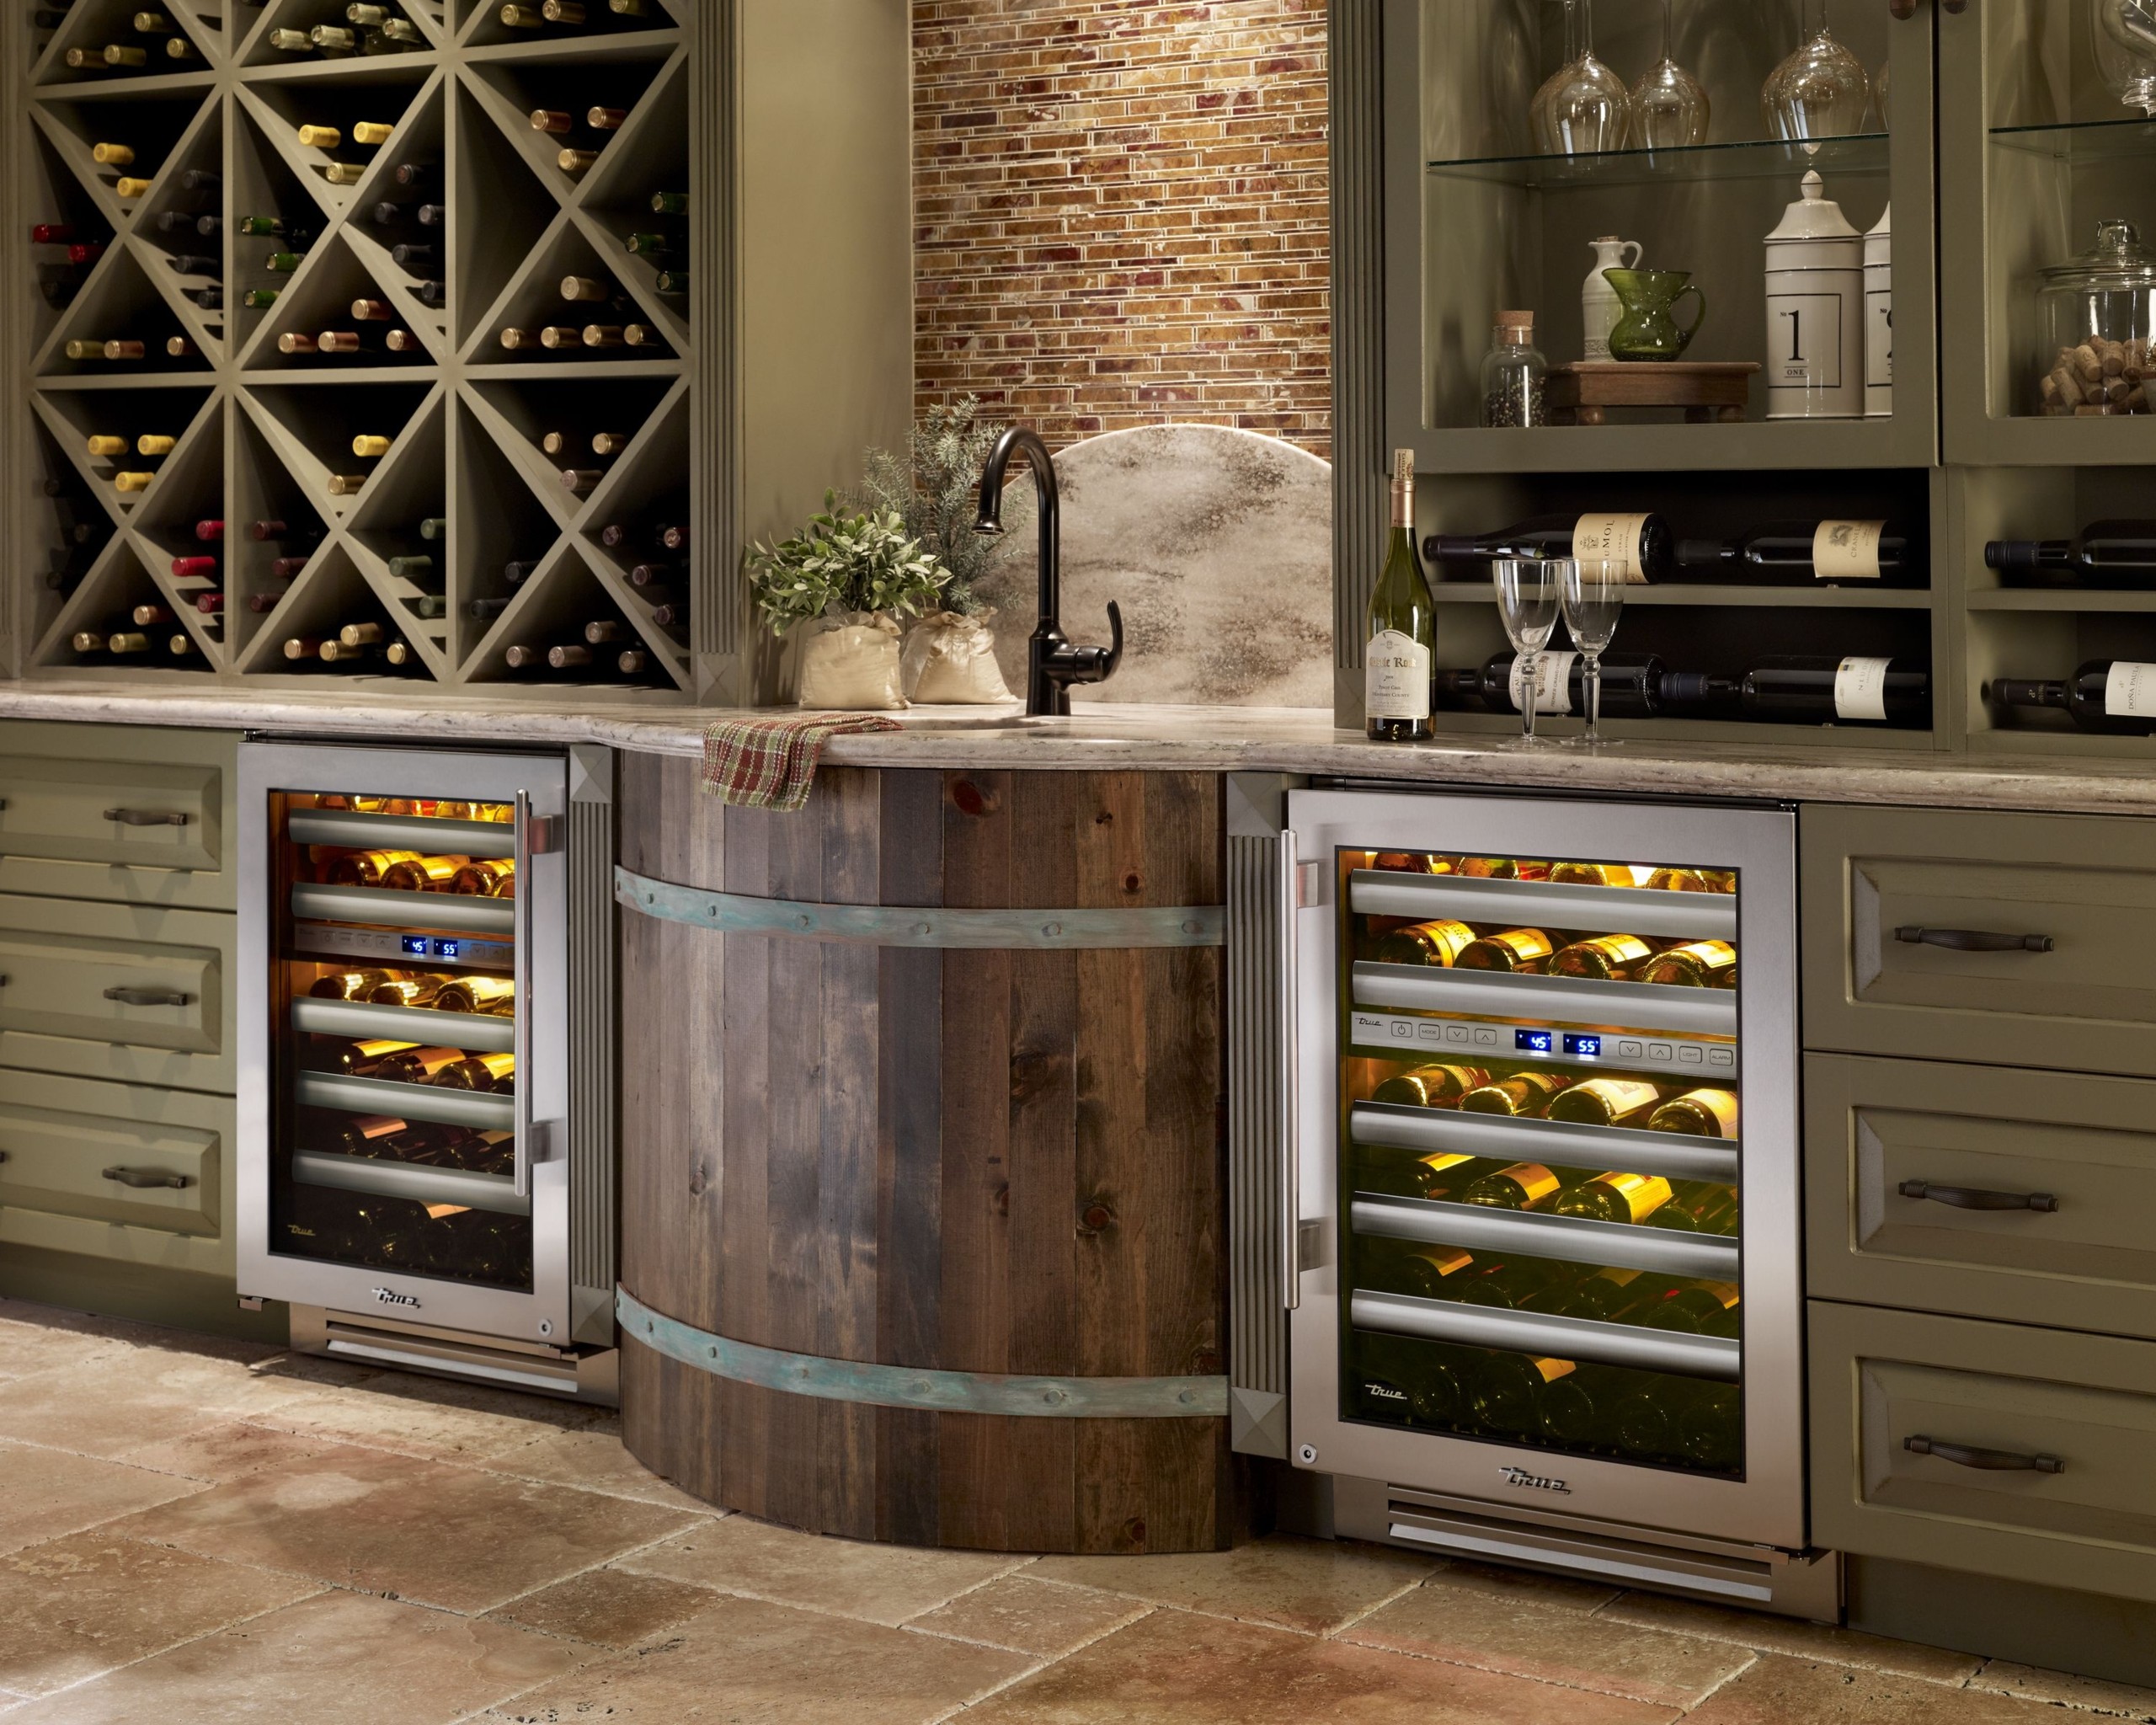
Cabinet Types and Suitability for Wine Fridge Installation
Different cabinets, different vibes. Here’s a quick rundown:
| Cabinet Type | Suitability | Pros | Cons |
|---|---|---|---|
| Built-in | High | Seamless integration, custom fit | Requires more planning and potentially modifications |
| Freestanding | Medium | Easy installation, can be moved | May not fit perfectly, less integrated look |
| Ready-to-Assemble (RTA) | Medium-High | Affordable, customizable | Requires assembly, may need modifications |
| Custom-made | High | Perfect fit guaranteed, tailored to your needs | Most expensive, longer lead time |
Post-Installation and Maintenance

Yo, so you’ve finally got your wine fridge all slotted into your cabinet – congrats! But hold up, the party ain’t over yet. Getting it up and running smoothly needs a bit more TLC than just plugging it in. Think of this as the after-party cleanup, making sure everything’s chill and ready for the main event: enjoying your vino collection.
Proper post-installation care is key to keeping your wine collection in tip-top shape. Ignoring this step can lead to premature aging, spoiled bottles, and a whole lotta wasted cash. We’re talking about preserving your precious nectar, peeps!
Stabilization Time
After installing your wine fridge, let it sit for at least 24 hours, ideally 48, before you start loading it up. This allows the internal components to settle and the temperature to stabilize. Think of it like letting a new phone charge fully before you start using all its apps. Rushing this step can affect the fridge’s performance and even damage the compressor. Patience is a virtue, especially when it comes to fine wine.
Temperature and Humidity Settings
Most wine fridges have adjustable temperature controls. The ideal temperature range for most wines is between 50-55°F (10-13°C). However, this can vary depending on the type of wine. Reds generally prefer a slightly warmer temperature, while whites and sparkling wines like it a bit cooler. Check your wine labels for specific storage recommendations. Humidity is also crucial; aim for around 50-70% to prevent cork dryness. Many modern fridges have digital displays making this super easy to adjust.
Routine Maintenance
Keeping your wine fridge clean is as important as keeping your kicks fresh. Once a month, gently wipe down the interior shelves and walls with a soft, damp cloth. Avoid using harsh chemicals or abrasive cleaners that could damage the surfaces or leave behind residues that might affect the wine’s taste. Every six months, you should give it a more thorough cleaning, including checking the condenser coils for dust buildup. Dust restricts airflow and can make the compressor work harder, potentially shortening its lifespan. Cleaning the coils is usually a matter of using a vacuum cleaner with a brush attachment.
Maintenance Checklist
Before we wrap up, here’s a handy checklist to make sure you’re on top of your wine fridge game:
- Allow the fridge to stabilize for at least 24-48 hours after installation.
- Set the temperature according to the type of wine being stored (generally 50-55°F (10-13°C)).
- Maintain humidity levels between 50-70%.
- Clean the interior monthly with a soft, damp cloth.
- Clean the condenser coils every six months.
- Inspect the door seals regularly for any damage or leaks.
- Check the temperature regularly to ensure it remains consistent.
Following this checklist will help keep your wine collection happy and your fridge running smoothly for years to come. Remember, a well-maintained wine fridge is a happy wine fridge!

